Tags are used in Learnosity authoring to make Items and Activities more contextualized and easily searchable and to be able to report on student performance on a set of Items or Activities.
Note: both Items and Activities can be tagged. Tags cannot be added to Questions or Features.
Tags will always appear in the format Tag Type: Tag, where a Tag Type is something like 'Subject' and a Tag is something like 'English'. You can have many Tags associated with a Tag Type.
In the Author Site, we have developed a Tag manager interface that allows you to create, modify and delete both Tags and Tag types.
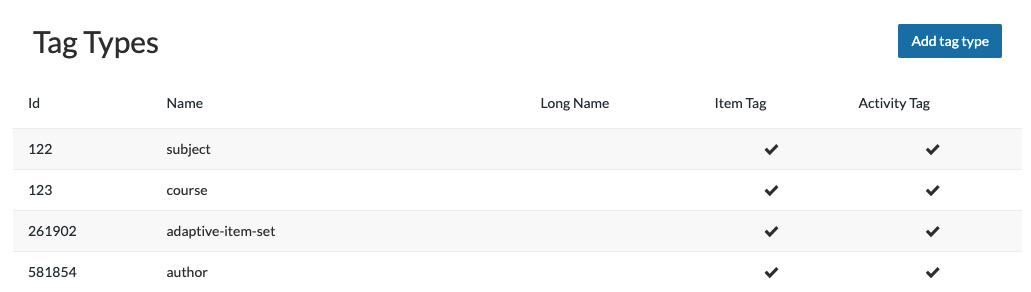
Figure 1: The Author Site tag manager.
Tags can also be used to set the parameters for Item selection for an individual test.
You can add Tags to Items and Activities in a couple of different ways:
To tag an Item on the Author Site, open the Item, hit Tags on the left, and start typing the Tag you are looking for. Once you have selected the Tag(s) you wish to add to this Item, hit apply before hitting save in the top right. You can also go to our Bulk Updates section and Tag multiple Items with the same Tags at one time. You can read more about how to do that here.
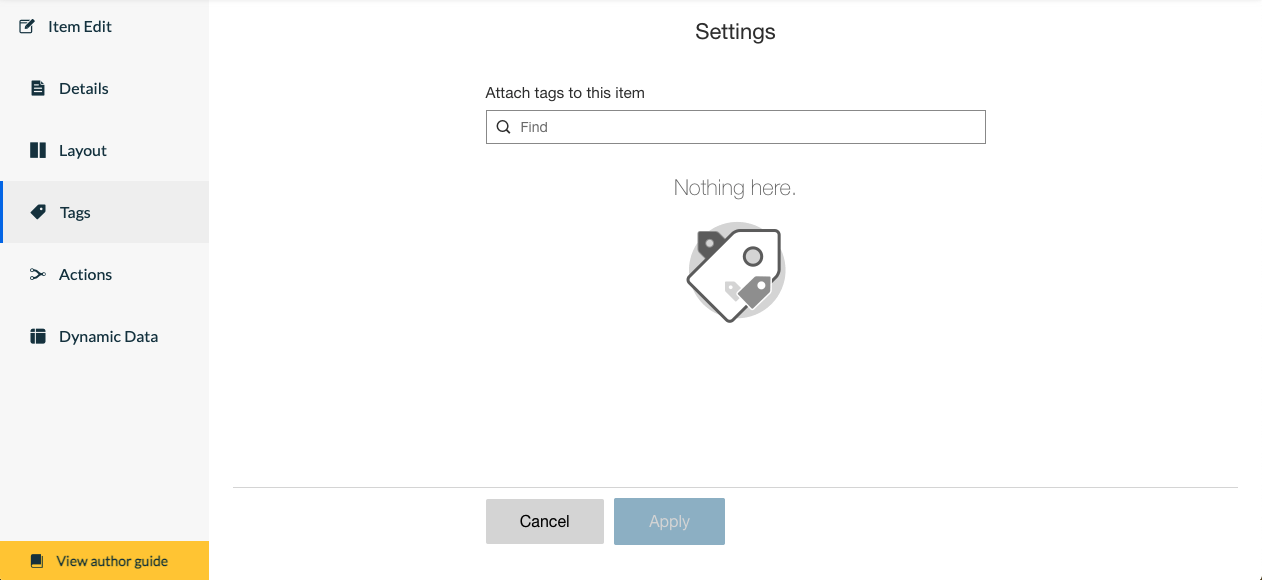
Figure 2: Tagging an Item in the Author Site
To tag an Activity on the Author Site, open the Activity and navigate to the Tags tab. Begin typing the Tag(s) you wish to add before hitting save in the top right. You can also go to our Bulk Updates section and tag multiple Activities with the same Tags at one time. You can read more about how to do that here.
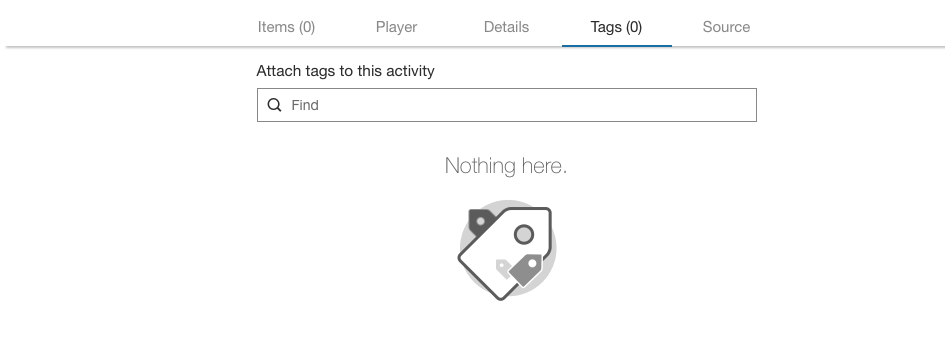
Figure 3: Tagging in the Activity Editor.
You can also create and maintain tag hierarchies on the Author Site - the main use case of which is configuring Tag-based reports.
You can automatically add Tags to newly created Items and Activities by using the tags_on_create init option for Author API on your host page, or through Authoring permission groups if using the Author Site.