The character map allows both the authors and learners to input characters inside a Question or a typed response without using a keyboard, instead, using Learnosity’s pop up character map.
Author Character Map
To input special characters into a Question as an author, select the character map button from the rich text editor toolbar. A pop-up box will appear containing a selection of characters, click the character you wish to input and it will be inserted into the Question.

Figure 1: the character map button in the rich text toolbar.
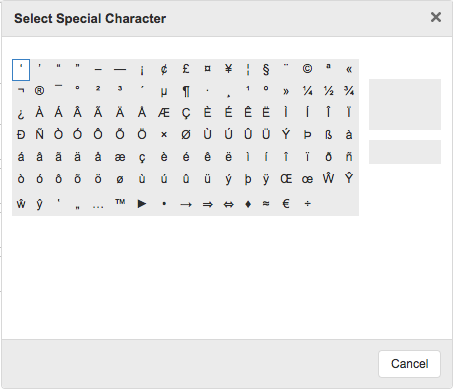
Figure 2: author facing character map.
Learner Character Map
To make a character map available to the learner in the essay, cloze text, label image with text, and short text Question types: go to the More options tab. Underneath the Layout section, enable the special characters check box.

Figure 3: special characters checkbox, with the 'characters to display' field.
You can customize the learner’s character map too. When special characters are enabled, a new option will appear underneath the special characters option called Characters to display. Enter in the characters you wish to display to the learner here - note that the characters should be entered one after the other, with no commas or spaces. Anything entered in the characters to display area will override the default Learnosity character map.
This will display a character map icon that appears in the learner toolbar (in essay Questions), or when the learner clicks into the text entry area (cloze text, label image with text, and short text Questions).
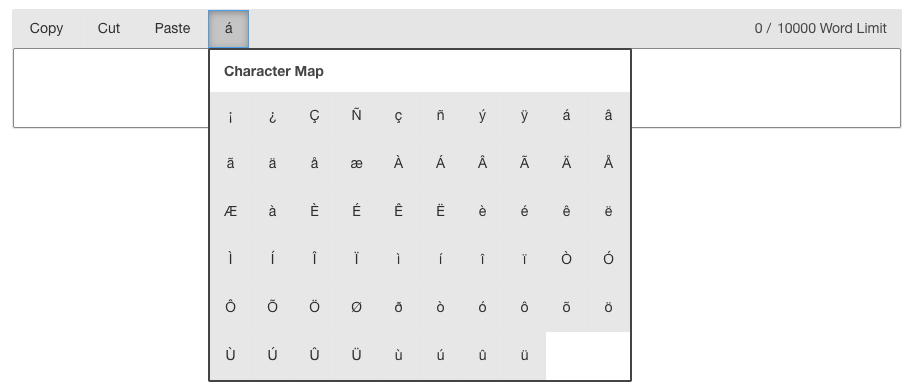
Figure 4: learner character map in the essay Question type.